How to Create a Sales Territory Map
Design balanced sales territories on a map: build them from states, counties or postcodes, assign reps, count accounts per territory and share with your team.
Updated · by the mapbow team
Good sales territories are fair, easy to understand and match the way your business records customers. Bad ones create overlap, arguments and accounts nobody calls on. A territory map makes the boundaries visible to everyone and lets you check balance before you commit. This guide walks through planning territories and building the map in mapbow.
Plan before you draw
1. Choose your balancing measure
Decide what "fair" means for your team. Common measures:
- Number of accounts – simplest; works when accounts are similar in size.
- Revenue or potential – better when account sizes vary a lot.
- Workload – visits needed per month, factoring in travel time.
- Market size – the number of target businesses (e.g. pharmacies, car dealerships, hotels) in each area.
2. Choose your building blocks
Territories should be made of units your CRM already knows – usually states, counties or postcodes. Then any new lead can be assigned from its address alone, and the map and your reports agree.
| Building block | Good for | Layer |
|---|---|---|
| States / provinces | National or regional teams | States & provinces |
| Counties / districts | Mid-sized territories | Districts & counties |
| Postcodes / ZIP codes | Dense urban territories | Postcode areas |
| Hand-drawn zones | Quick, informal coverage | Tools › Territories |
Build the territory map, step by step
The quickest way to a territory map is to draw each territory by hand. If your territories follow official boundaries – states, counties or postcodes – use the method in the next section instead, or combine the two.
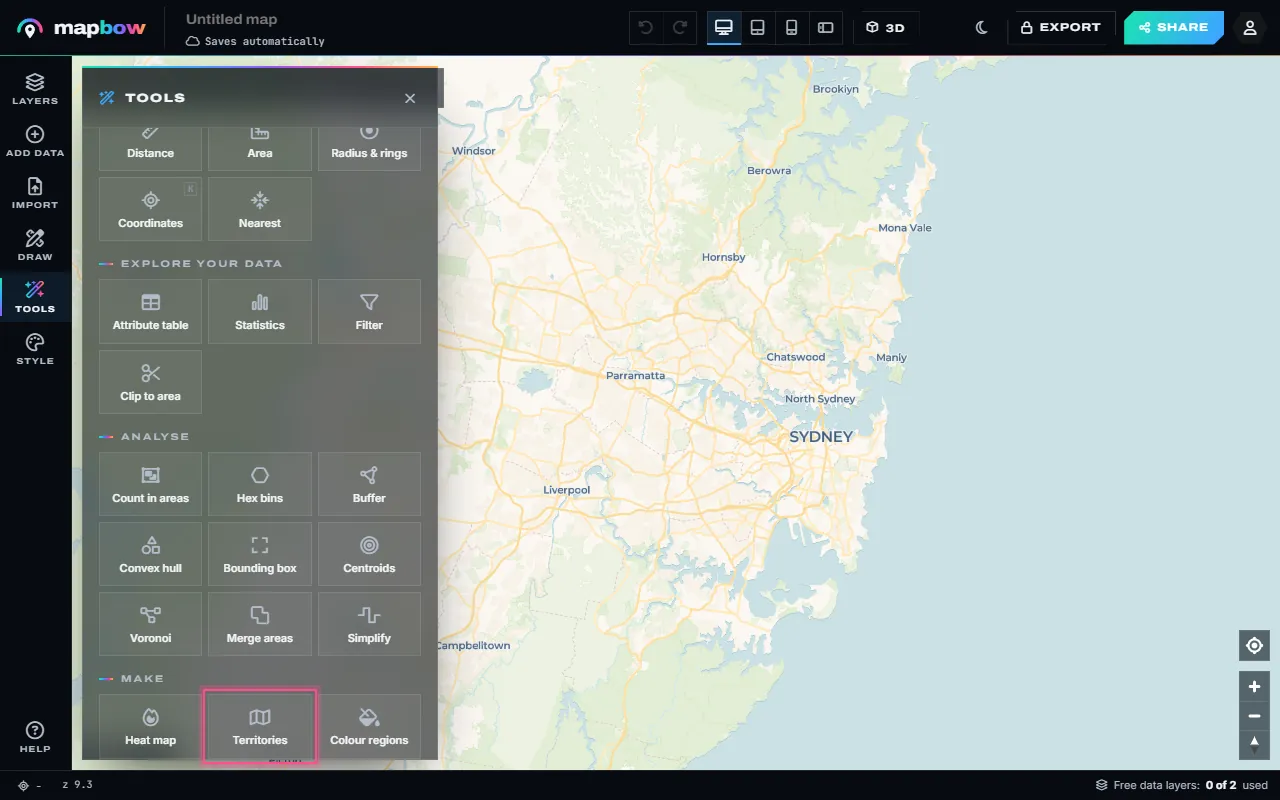
- Choose Territories. Open Tools and choose Territories (or start from the territory map maker). Every area you draw becomes its own territory with its own colour, label and legend entry.
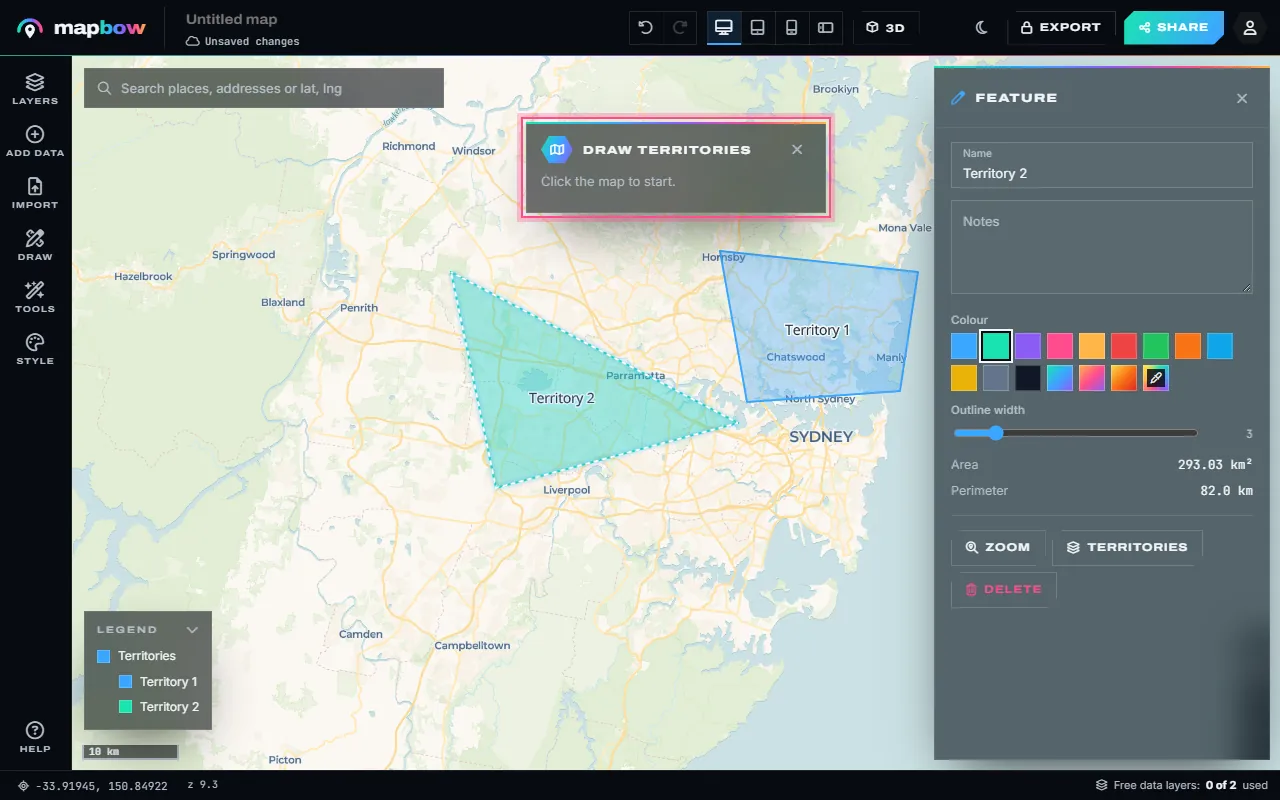
Step 1 Tools › Territories. - Draw each territory. Click round the first area and press Enter (or double-click, or click the first point). Backspace removes the last point. The tool stays on, so you can draw the next one straight away.
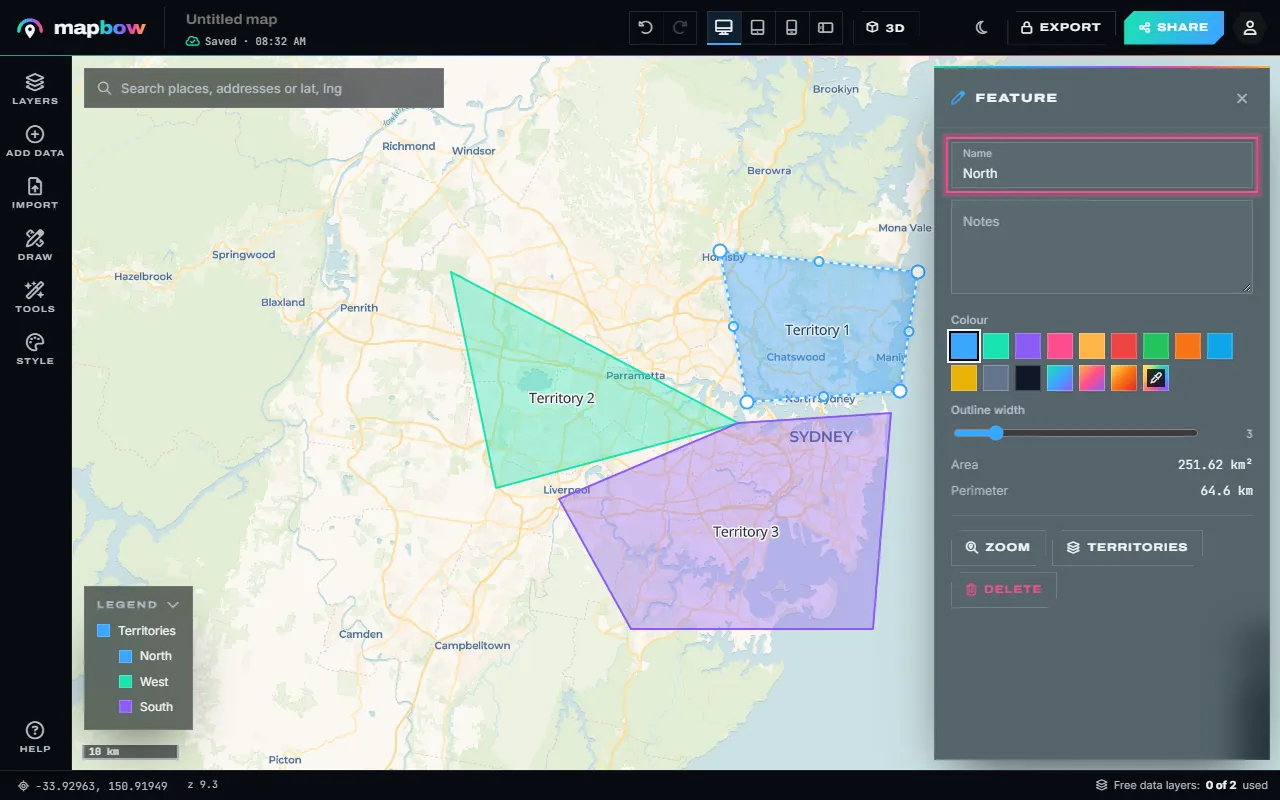
Step 2 Two territories drawn, the third on its way. - Name them and pick colours. Click a territory to name it ("East – Priya"), choose its colour and add notes - a rep's name, a target, a phone number. Its area and perimeter are measured for you. Drag the white handles to adjust a border.
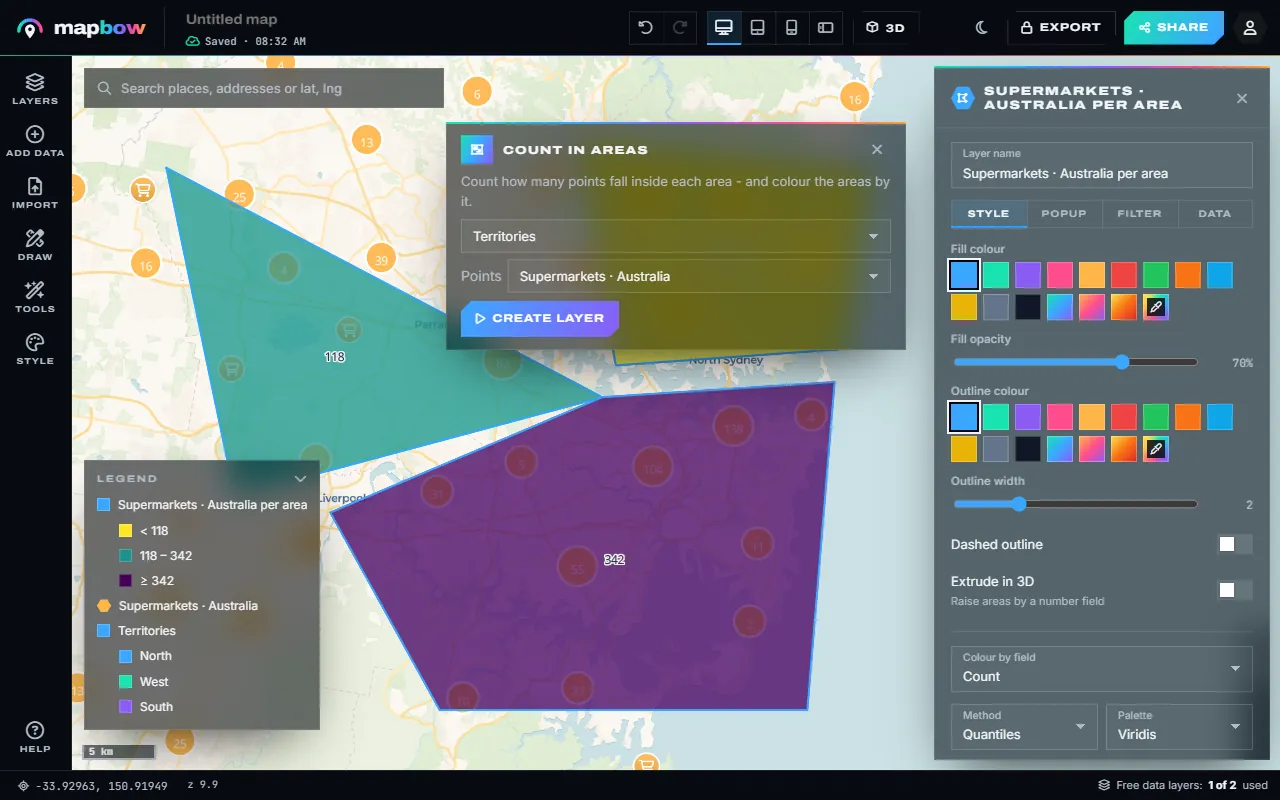
Step 3 Territories named North, West and South, with a legend. - Balance them with data. Add a layer of customers or prospects - your own list, or supermarkets, schools or businesses from Add data - and use Tools › Count in areas to see how many each territory holds.
Step 4 Supermarkets counted in each territory.
Count in areas makes a new layer with each territory coloured and labelled by its count, and the count in its popup. If the numbers are uneven, reshape the borders and run it again. Then share the link with the team or embed it on the intranet.
Build territories from states, counties or postcodes
When territories must match the units in your CRM, paint them from a boundary layer instead of drawing them:
- Add the boundary layer. Open Add data, pick your country and the building block – states & provinces, districts & counties or postcode areas. This uses one of your two free data layers. For whole countries, the free World countries layer works too.
- Open Tools › Colour regions and choose the boundary layer in the card.
- Paint each territory. Pick a colour, then click every region that belongs to it. Click a region again (or use the eraser) to clear it. Use one colour per territory.
- Name the colours. Select the boundary layer and give each painted colour a legend label in the inspector – the rep's or territory's name.
- Import your accounts. Bring in a CSV or Excel file of customers or leads with coordinates or addresses (Import – free and unlimited).
- Check the balance. Run Tools › Count in areas with the boundary layer and your accounts to count accounts per region, add up each territory's regions, and move border regions between territories until the totals even out.
Principles of good territory design
- Contiguous. Each territory should be one connected area, so reps don't drive through someone else's patch.
- Compact. Avoid long thin shapes; they mean long drives.
- Balanced within ~10–15%. Perfect balance is rarely worth the complexity.
- Anchored to a base. Draw a radius around each rep's home or office to check reach.
- Stable. Redraw at most once or twice a year; relationships matter.
Keeping it up to date
Because the shared map and every embed update instantly, the territory map can stay the single source of truth. When you rebalance, edit the map and everyone sees the new boundaries straight away. With any purchase you can also export territories as Shapefile, GeoJSON or KML for your CRM or BI tools (export guide).
Beyond sales
The same process works for service areas, delivery zones, franchise boundaries, school catchments, volunteer canvassing districts and maintenance regions.
Example: splitting a country into four territories
Imagine a team of four reps covering a whole country, selling to independent pharmacies:
- Measure the market. Add the pharmacies layer and the districts & counties layer, and run Tools › Count in areas to count pharmacies per county.
- Set the target. Divide the total by four. That is roughly how many pharmacies each territory should hold.
- Seed each territory. Open Tools › Colour regions, give each rep a colour and paint the county containing their home base.
- Grow outwards. Add neighbouring counties to each territory in turn, keeping each territory connected, until each is near the target.
- Resolve the edges. Swap border counties between neighbours until every territory is within about 10% of the target and no rep has an unreasonable drive.
- Publish. Give each colour a legend label with the rep's name in the inspector, then share the map.
Handling special cases
- Key accounts. Large national customers are often handled by a dedicated manager regardless of territory. Put them in their own layer with a distinct icon so they are visible but not counted twice.
- Remote areas. Very large, sparse regions may need a lower account target to allow for travel time.
- Split cities. Big cities sometimes need to be split by postcode. Use postcode areas just for those cities and counties or states elsewhere.
- Overlapping coverage. If two teams genuinely share an area, show it with a semi-transparent overlap and note who owns what in the popup.
Presenting territories to the team
Territory changes are sensitive. A clear map makes the conversation easier: show the old and new territories as two layers that can be toggled, include the account counts in each territory's popup, and preview the map on a phone – that is where reps will look at it on the road.
Frequently asked questions
What is a sales territory map?
A map dividing a market into areas, each assigned to a rep or team, usually colour-coded with a legend.
Can I create territories by ZIP code?
Yes, in countries where postcode boundaries are available. Add the postcode areas layer, open Tools › Colour regions and click the postcodes that belong to each territory.
How do I balance territories?
Import your accounts or add a layer of target businesses, count them per territory with Tools › Count in areas, and shift borders or border regions until the counts are close.
Can my team see the map without an account?
Yes. Once you switch on Anyone with the link can view (which needs a free account for you), anyone with the link can view it; only you can edit.
Is it free?
Yes – including two built-in data layers per map. Extra layers and exports are available as one-off purchases.